
Earlier this year, I decided to design a project to evaluate Seeed Studio’s Fusion PCBA service. I didn’t have any immediate need for a PCBA, and so I found myself in the classic hobbyist situation: a solution in search of a problem.
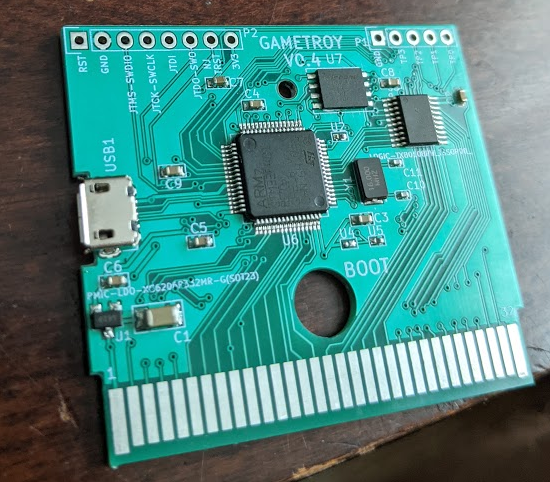
The project needed a low parts count, a small PCB, and it had to be fun to design. I settled on a programmable Gameboy cartridge to meet my hobbyist needs. So, with Seeed Studio’s fusion PCBA parts library in hand, I fired up KiCAD and began my design journey! I began with some handy footprints from Gekkio’s awesome Gameboy footprints library, available on their GitHub: https://github.com/Gekkio/gb-hardware

Unfortunately, I had chosen the wrong footprint for the selected Flash chip, but Seeed Studio caught the issue and was able to help me correct it easily. Overall, their service was very good! I happily received my PCBA’s in a number of weeks.
Upon receiving the boards, I soon discovered that I did not place the mounting holes in the standard locations for a Gameboy shell. No worries though – that’s where FreeCAD and a set of calipers come in handy. Exporting a 3d rendering of the PCB from KiCAD took any guessing out of the equation:

The final result looks pretty good – I will note that a Gameboy PCB should be 0.6mm, but in my excitement, I must have accidentally selected 1.6mm. Therefore, the cartridge shell is very thin at the back, but the PCB gives it rigidity.

Setting up a project in STM32 Cube IDE is trivial work, however – I discovered that I had used a slightly incompatible footprint for the MCU. One of the pins is no longer available for GPIO:

I double-checked all of the library components and indeed found that it was my mistake. That’s the price you pay for feverish hobbyist development, I suppose! Fortunately, I have GPIO to spare (At the top of the PCB), so I can do a hardware patch without any issues.
In bringing the board up, however, I have found that I am unable to get the MCU running at the intended 84 MHz – anything above 48MHz triggers hard faults in the CPU. Luckily, STM32 Cube IDE makes it trivial to configure global clock settings. I am not yet sure if this will be fast enough to meet the timing requirements of the Gameboy – I was unsure about 84MHz being fast enough. But, we will soon enough find out.
Stay tuned for hardware patching and new revisions!